
Back when the Raspberry Pi was first released in 2012 Michael Bacarella wrote a blog post on using OCaml and Async on this little device. Since then installing OCaml via opam has become a pretty smooth experience and everything works out of the box when using Raspbian – the default Raspberry Pi distribution.
Raspberry Pis are commonly used to teach programming as students get an immediate feeling of how their projects work in the ‘real world’. There are many resources for learning Python on the Raspberry Pi, but we were wondering if we could also use this single-board computer to help students learn OCaml and the common paradigms that we use here at Jane Street (such as Async for concurrent programming). A fun way to do this is to use a Raspberry Pi to drive a small autonomous robot car using OCaml to write the driving logic. We tried this with two different robot car kits:
- The Freenove Three-wheeled Smart Car Kit (F3W), a three wheeled robot.
- The Adeept AWR 4WD Smart Robot Car Kit (A4W), a four wheeled robot.
Separately, we got a Raspberry Pi 3B+ as in both cases the robots came as a kit that that did not include batteries or a Raspberry Pi and the 4B version was not yet available at this point. Both kits include a camera and an ultrasonic sensor to measure the distance to obstacles. Some Python code is provided to illustrate how to interact with the different sensors, run the motors and servos, and use some additional features like LEDs or Buzzer modules. This code can be found on GitHub in the Adeept repo and in the Freenove repo.
The main difference between the two kits is that for the F3W, the two front wheeled are motorized and a servo is used to change their direction. For the A4W all four wheels are motorized and their directions cannot be changed so turning is done ‘in-place’ by rotating the wheels faster on one side of the robot and slower (or backwards) on the other side.
After a couple hours we were done with building the robots and could start playing with the Python examples. Everything worked smoothly and we moved to the next step: replacing Python with OCaml. Installing the compiler and libraries such as Base or Async via opam was a breeze but we still had to get the OCaml code to interface with the Raspberry Pi GPIO (General-Purpose Input/Output) and to write easy to use APIs for the two robots.
F3W: Controlling the Robot via I2C/SMBus
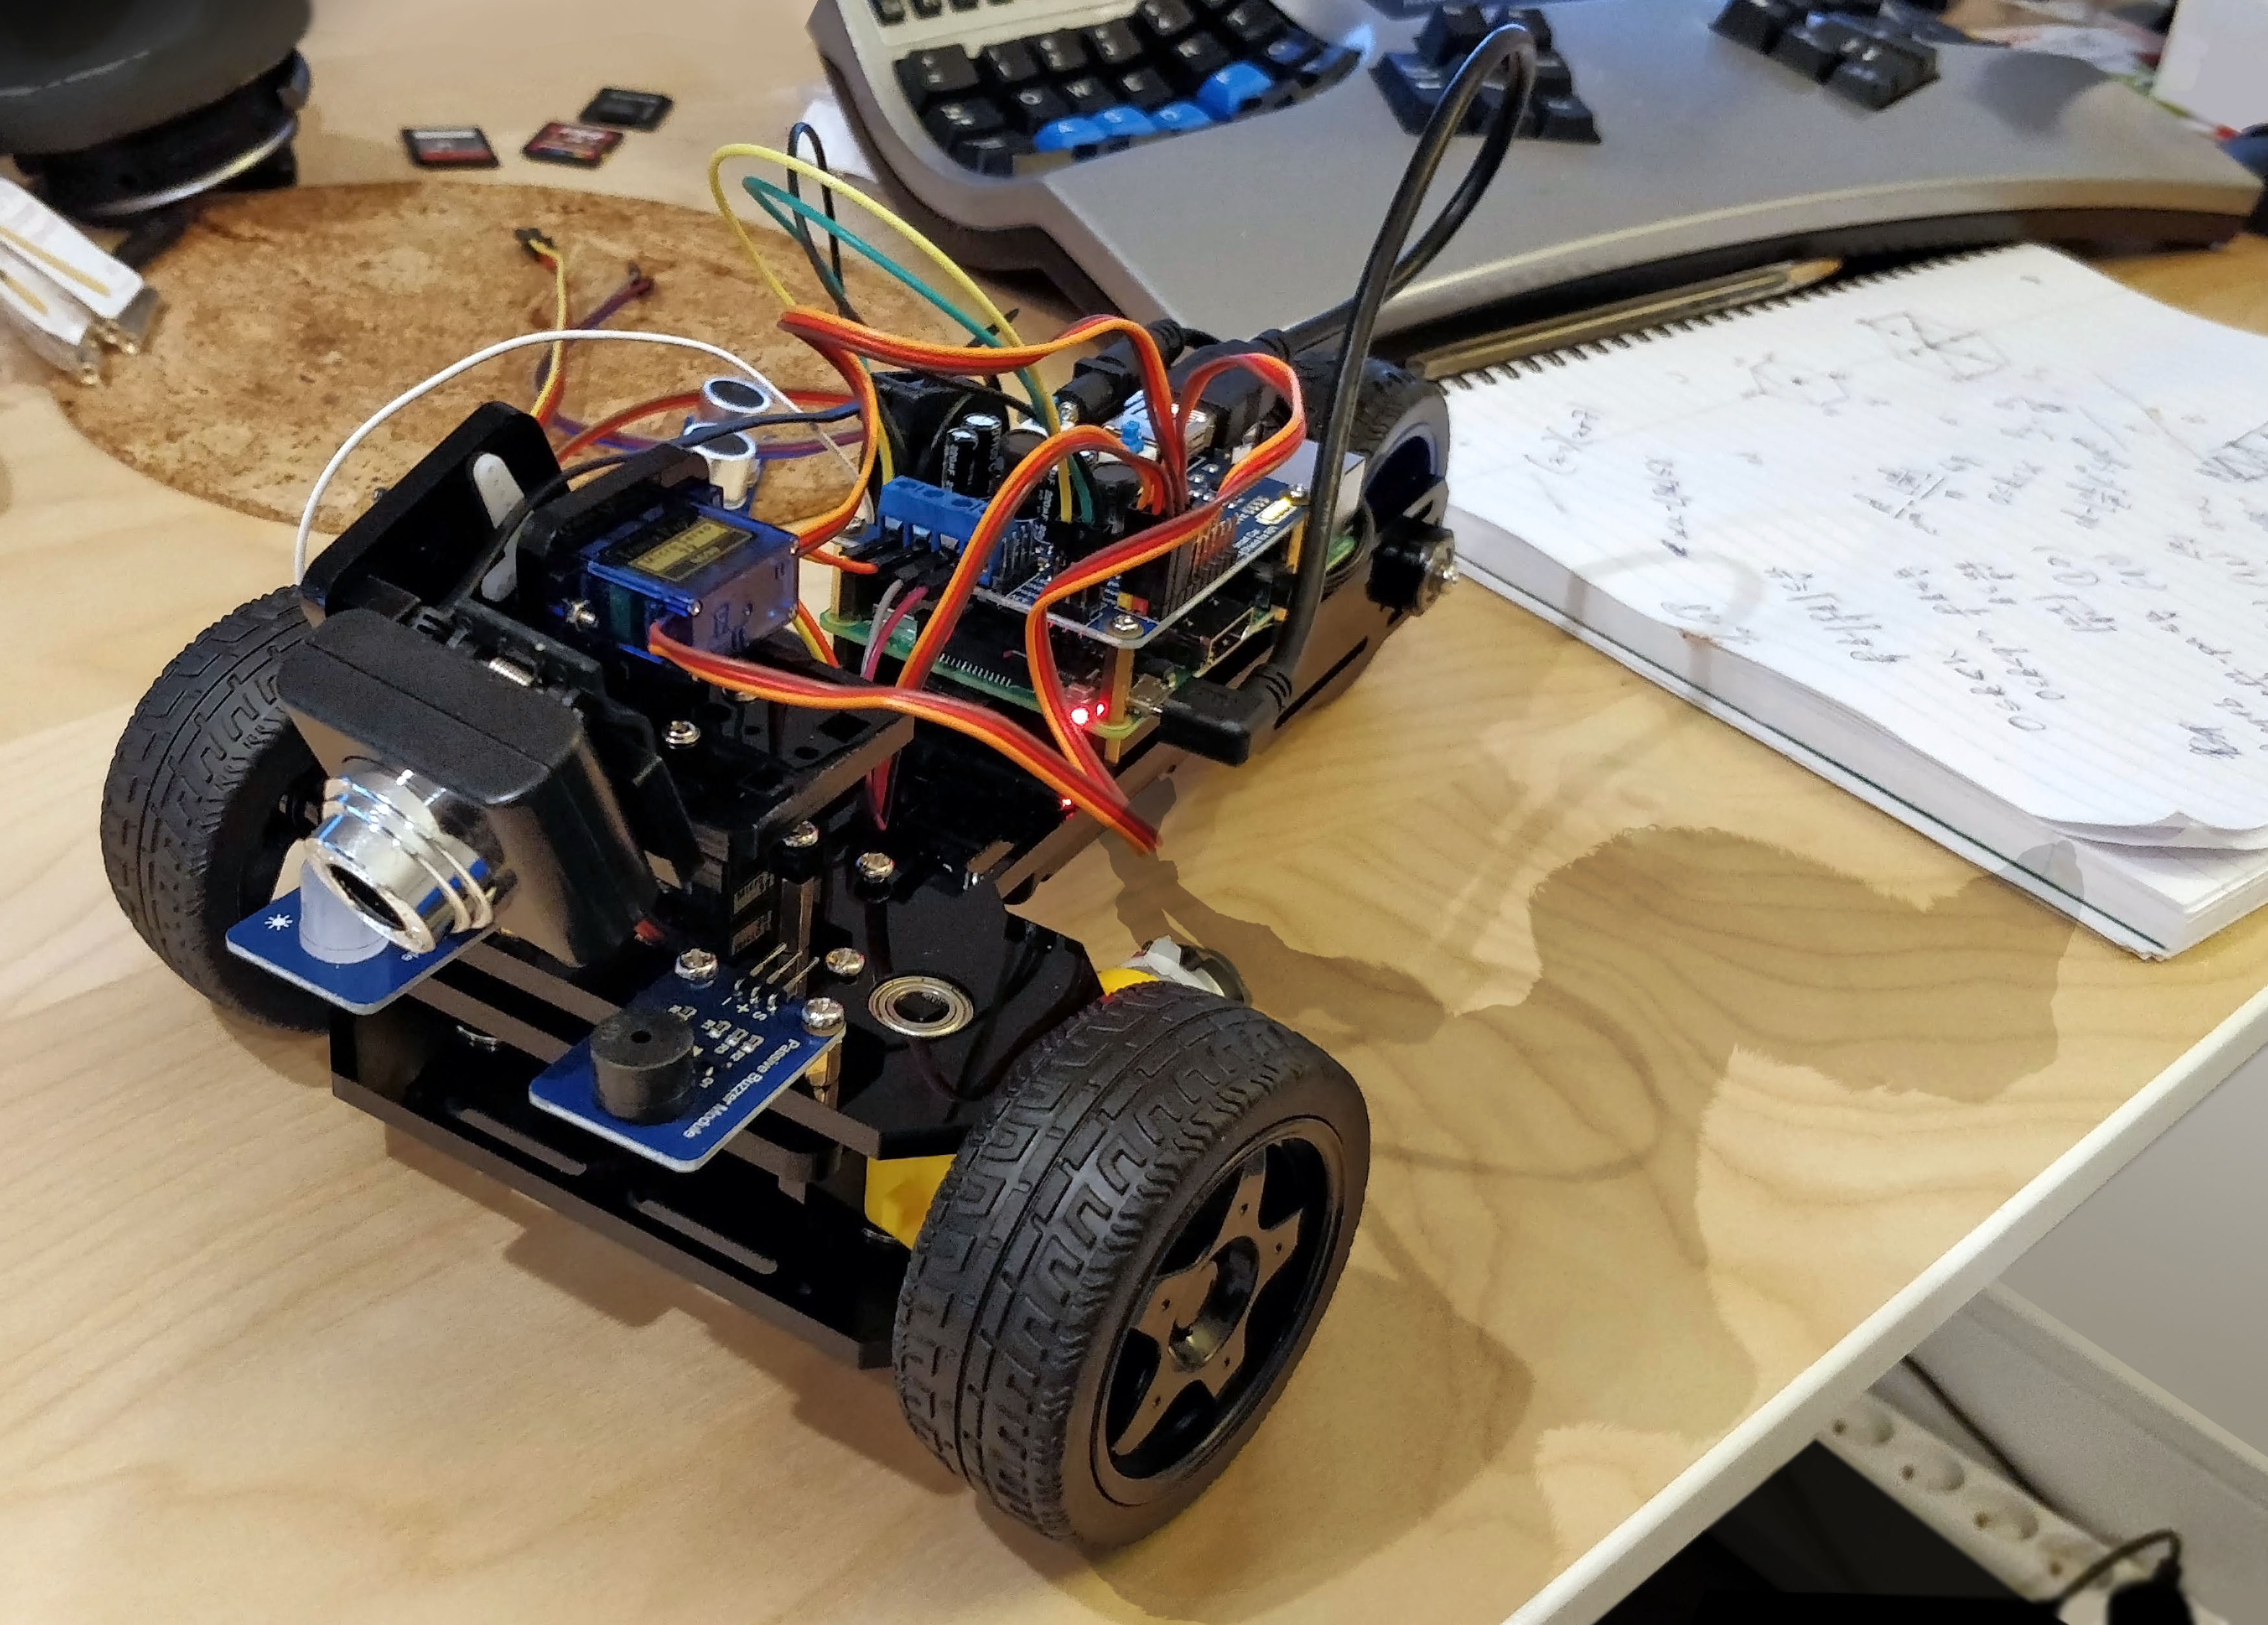
The F3W robot we built can be seen in the image at the top of this post. It includes a camera, some ultra-sonic sensors to measure the distance to the nearest obstacle, a RGB led, and a buzzer. There are two motors connected to each front wheel, a servo to control the robot direction, and another servo to control the direction of the ultrasonic sensor and/or camera.
The provided Python examples use SMBus through the I2C/dev interface so we wrote some small OCaml bindings to be able to open I2C devices and read/write data. The code for this can be found in the ocaml-smbus repo on GitHub.
The Robot API
The I2C operations got abstracted in the Bus module with a simple
interface
and on top of this we wrote our robot API. This API looks as follows:
type t

val create : unit -> t
val set_rgb : t -> [ `white | `red | `green | `blue | `off ] -> unit
val set_buzzer : t -> level:int -> unit
val set_pwm : t -> level:int -> unit
val get_sonic : t -> float

(** [set_servo1 t v] sets servo 1 to orientation [v] between 0 and 1. *)
val set_servo1: t -> float -> unit
val set_servo2: t -> float -> unit
val set_servo3: t -> float -> unit
The create function can be used to connect to the relevant I2C device. With
the returned value, one can:
- Set the color of the RGB led via
set_rgb. - Produce some sound with
set_buzzer. - Actuate both motors with
set_pwm. - Get the distance to the closest obstacle (in centimeters) from the ultrasonic sensor using
get_sonic. - Set the directions of the 3 different servos.
Here is a simple program that makes the RGB LED blink in different colors.
let () =
  Mdev.set_rgb mdev `red;
  Unix.sleep 3;
  Mdev.set_rgb mdev `green;
  Unix.sleep 3;
  Mdev.set_rgb mdev `blue;
  Unix.sleep 3;
  (* Turn the led off. *)
  Mdev.set_rgb mdev `off;
The Sonic-Scan Module
As our ultrasonic sensor orientation can be changed via a servo, we thought that it would be nice to have it run like a rotating radar: the angle of the sensor is constantly adjusted so that we have recent reads for the obstacle distance in front of us, as well as on the left and right sides. The difficulty is that we would also like to run our driving algorithm concurrently, and adjust the robot direction and speed based on recently measured distances. In order to achieve this being able to run multiple threads would be helpful. As the Raspberry Pi has more horsepower than typical embedded systems we used Async to handle concurrency. Here is a sketch of how we wrapped the ultrasonic sensor thread in its own module. The full code can be seen here.
module Sonic_scan : sig
  type t
  val create : Mdev.t -> angles:float list -> refresh_span:Time_ns.Span.t -> t
  val distances : t -> float list
end = struct
  type t = { mdev : Mdev.t; distances : float array; angles : float list }

  let refresh t =
    Deferred.List.iteri t.angles ~f:(fun i angle ->
        Mdev.set_servo2 t.mdev angle;
        let%map () = after (Time.Span.of_sec 0.1) in
        t.distances.(i) <- Mdev.get_sonic t.mdev)

  let create mdev ~angles ~refresh_span =
    let distances = Array.init (List.length angles) ~f:Float.nan in
    let t = { mdev; distances; angles } in
    Clock_ns.every' refresh_span (fun () -> refresh t);
    t

  let distances t = Array.to_list t.distances
end
The Sonic_scan.create function is used to create and start the module. It is given
the list of angles at which to monitor the distance as well as some target refresh
rate. The Sonic_scan.distances function returns the last measured distances.
Most of the Async interaction is abstracted so that the module user does not have
to know about the implementation details.
The driving logic can then use this module to adjust the direction and speed of the car over time:
- If the front distance is less than 20 cms we stop the car.
- If it is more than 60 cms we drive straight ahead.
- Otherwise, if the distance measured on the left is shorter than the one on the right we adjust the direction to turn right and conversely if the right distance is shorter than the left the direction is adjusted to turn left.
  let right_dist, center_dist, left_dist =
    match Sonic_scan.distances sonic_scan with
    | [ x; y; z ] -> x, y, z
    | _ -> failwith "unexpected distance list length"
  in
  let pwm_level, angle =
    if Float.( < ) center_dist 20. then 0, 0.5
    else if Float.( > ) center_dist 60. then 400, 0.5
    else if Float.( < ) right_dist left_dist then 300, 0.3
    else 300, 0.7
  in
  Mdev.set_pwm mdev ~level;
  Mdev.set_servo1 mdev angle
Using this very naive logic we got our car to run through a corridor and avoid the walls (most of the time). This logic can certainly be improved upon to be made more robust, e.g. using a PID controller.
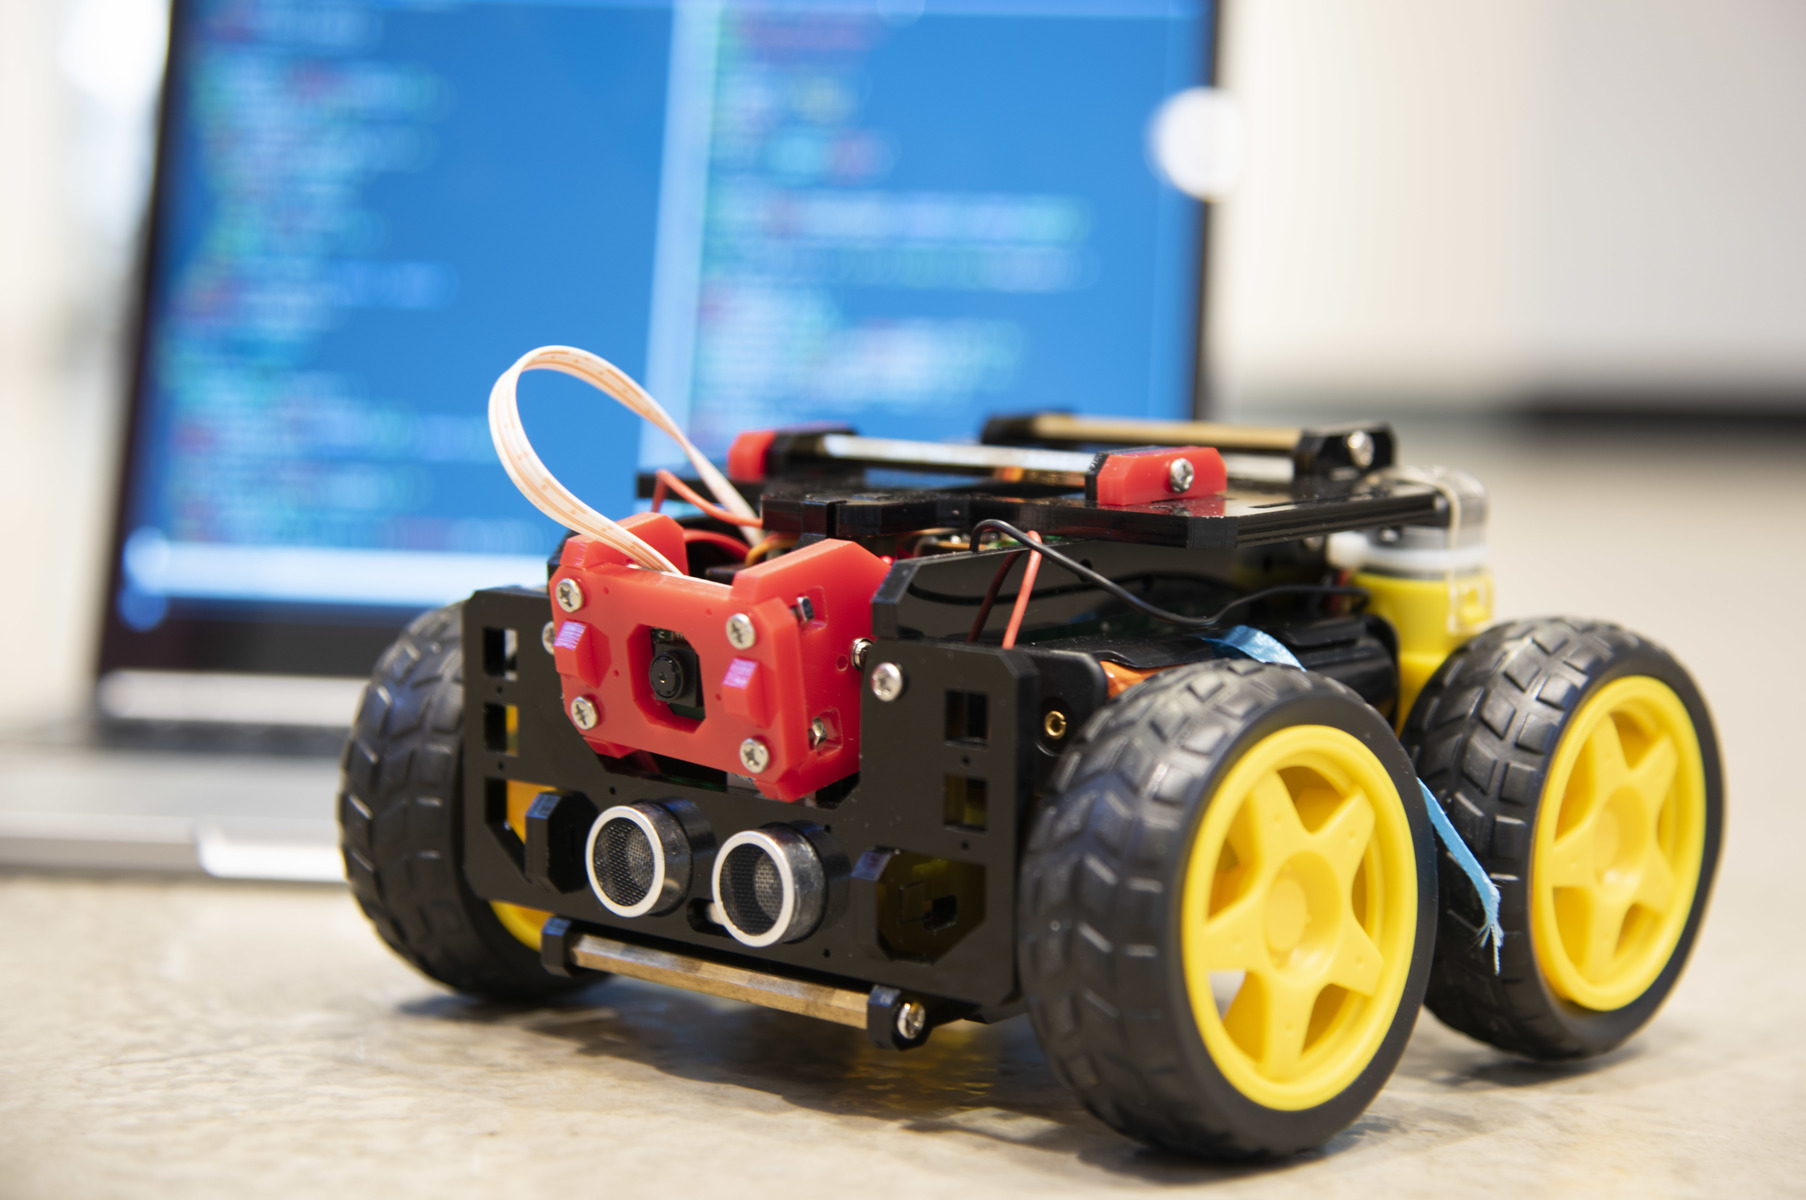
A4W: Using the Raspberry Pi GPIO directly
The A4W robot is smaller than the F3W. It is also easier to control as the direction is fixed. The four motors can be controlled independently and the ultrasonic sensor also has a fixed orientation looking straight ahead.
The Python examples for the A4W use the PyPI RPi.GPIO package.
The underlying C API works by mem-mapping the /dev/gpiomem device and directly reading from or
writing to it.
Once again we wrote some OCaml wrappers around these low-level features, the related code
can be found in the
ocaml-rpi-gpio github repo.
The resulting API ends up being fairly simple and uses phantom types for improved type safety.
type _ t

val create_input : channel:int -> mode:[ `bcm | `board ] -> [ `input ] t
val create_output : channel:int -> mode:[ `bcm | `board ] -> [ `output ] t
val input : [ `input ] t -> int
val output : [ `output ] t -> int -> unit
val close : _ t -> unit
The robot API then consists of two modules. The Ultrasonic module handles measuring the
distance to the closest obstacle. Here the OCaml code measures the elapsed time
between when sending the ultrasound waves and receiving it back and assumes a speed of
sound of 340 meters per seconds to return a distance in meters.
The Motors module makes it easy to set the motors to run at some given speed, speed_left
is for left-hand side motors and speed_right for right-hand side motors.
module Ultrasonic : sig
  type t
  val create : unit -> t
  val get : t -> float
end

module Motors : sig
  type t

  val create : unit -> t
  val move : t -> speed_left:float -> speed_right:float -> unit
  val reset : t -> unit
end
The full code for this can be found in awr.ml.
A very simple example use of these modules consist in getting the robot to move forward as long as the closest obstacle is at least 60cm away. When an obstacle is detected closer than this threshold, the robot turns right until there is no obstacle.
  let motors = Motors.create () in
  let ultra = Ultrasonic.create () in
  while true do
    Unix.sleepf 0.1;
    let d = Ultrasonic.get ultra in
    let speed_left, speed_right =
      if Float.(d < 0.1) then 0., 0.
      else if Float.(d < 0.6) then 70., -70.
      else 100., 100.
    in
    Motors.move motors ~speed_left ~speed_right
  done
Once again this navigation algorithm is very basic but already gets the robot running around and avoiding obstacles.
Follow-Ups
Using OCaml on these Raspberry Pi robots was a very interesting experience, allowing us to learn about the low-level bits of how GPIO works as well as other kernel subsystems. We also hope that this can be leveraged in new fun ways to learn OCaml.
There are several things that we would like to explore next:
- We didn’t use the embedded cameras from our robot. Using some computer vision models would give the driving algorithm far more context on the outside world. We have an OCaml implementation of the YOLOv3 object detection model however the Raspberry Pi is a bit under-powered to run such deep learning models so maybe would it be worth upgrading to a jetbot with its embedded GPU.
- Lidar modules have become increasingly less expensive in the past few years. These modules yield far more robust distance estimations compared to ultrasonic sensors. This would make for a nice addition to our robot cars.
- We only implemented some very simple driving logic. It would be interesting to experiment with more complex algorithms, for example trying to achieve loop-closing in simultaneous localization and mapping.